Post by Melissa on Feb 26, 2010 11:16:13 GMT -5

This is my very first tut hope this comes out right
OK Here goes
This tut is my creation any similarities are just coincidential
I wrote this tut November 8th 2009
SUPPLIES NEEDED
--Im using PSPx2 but im sure any version will do
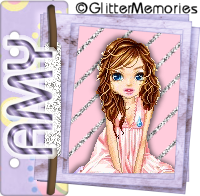
--Tube of choice i used the beautiful art work of Keith Garvey you need a licence to use his work. You can find it at www.mypsptubes.com
-- Mask of choice
--Template from Blissfully Beth Calles Sugar lips #114 find it blissfullybeth.blogspot.com
Plug Ins Used
- Mura's Meister--Copies
- Eye Candy 4000--Gradient Glow
- Penta.com--Color dot
On to the Tut
-- First open the template and duplicate it (shift D)
-- Image-resize-500x500-delete copyright & bottom layer
-- Highlight Lips-Adjust-colorise to ur tube-add drop shadow
-- Highlight the pink square with the magic wand--add new raster-flood fill color to match tube
-- Add your tube and fit to your new square-Effects-Eyecandy-grradient glow with this BASIC-3-25-100 COLOR set to FAT-color white
-- magic wand on square-selections-invert-delete on the tube
-- Highlight the white frame Layer with your magic wand-new raster layer-flood fill with color of your liking-effects-gradient glow same settings as before but change to thin-color white-selections-none- effects-penta.com-color dot with these settings Value-255-distance 10-Color R,G,B all 255- ok-add drop shadow
-- Highlight the word art Sugar Lips and use your magic wand to highlight just the pink area-add new raster layer-color to fit your tube-Adjust-add noise to these settings Gaussian-44 Noise-Monochrome checked add drop shadow to the original sugar lips
-- Highlight black rect with your magic wand-add new raster-Flood Fill with these settings-background color black foreground a color from your tube-Gradient to these settings -Linear-Angle 45-Repeats 3
-- Using your text tool Type out Sugar (or what ever text u would like to use)objects-Align-Center of Canvas-Effects-Mura's Meister Copies with these settings Tilting-keep everything the same except change Tile gap to 1-OK (i had to line mine up a lil bit) Click the black rect again with your magic wand-selections-invert-delet on your words layer
- Add your tube and size so you can fit 4 of them and duplicate it 3 times arrange as shown on mine then merge
all 4 change - settings to Lumanance (legacy)opacity 75 - Magic wand on black rect again-Sections-invert-delete on tubes layer
-- Click on the blue frame with your magic wand-new raster layer-floodfill with your same gradient color except change the angle to 143-select none-effects-eyecandy400-Gradient glow with same setting as before add drop shadow
-- Click the blue rect with your magic wand-add new rasper layer-fill with color of choice--selections-none-effects-pents.com with same settings
-- Highlight black frame effects-eyecandy-gradient glow with setting as before add drop shadow
-- Delete all un needed layers
-- Add your mask of choice, Name you would like on it and copy right and wuualaa you are done
Thanks to who ever bares with me through this tut im sure ill get better with time..
Here is another example